Painting - PSP Tips
Building Trucks
(Painting 2 - PSP Tips & Tricks)
~ by Alpine ~
This tutorial was created using Paintshop Pro only ! No plugins were used. I think everything you see done here is functional with Paintshop Pro 4, as well as 5 (and probably 6). Important: While painting this example vehicle, my colors were set to 16 Million. Many functions will not work at 256 colors.
Straight into Painting !
So you have a nice image you want to make a truck out of? Well lets get you started cuzz that first section was pretty boring! Informative to newbies but Bo - RING!
|
Step 1. Snatch some decent textures to work with. I strongly suggest
one that has the truck sections sized perfectly and not slapped up the
side of the wall like Executioner. DAMN that truck sucks to paint! Some
others have sides that have a 2 or 3 -pixel difference between one side
and the other. I find Firestone Wilderness very simple to work with. If
you have ever seen my bryce3D truck, it was painted on the Firestone textures
and the alignment was nailed perfectly on the first try. Simply flawless...
Now you need a workspace so grab the front and rear for one side and lets
get busy. If you plan on applying text that will stretch from one texture
to the other, you better grab both sides and paste them side by side on
a new image like I have done with this.
|

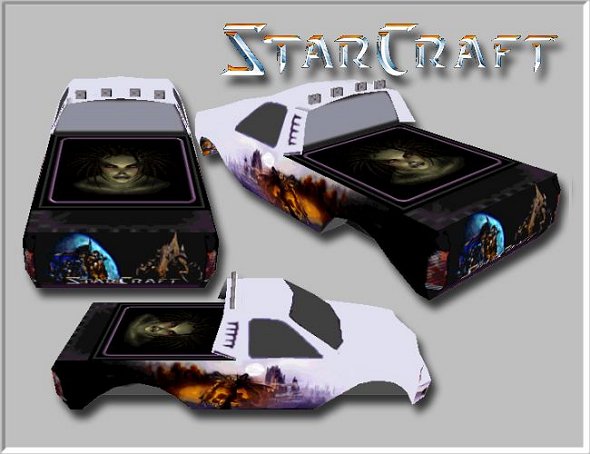
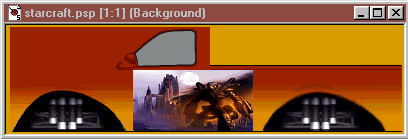
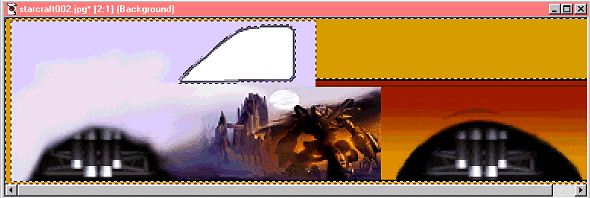
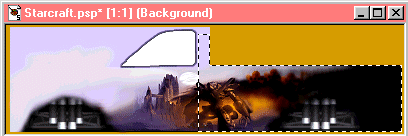
A StarCraft Image pasted onto the side of Firestone Wilderness
|
|
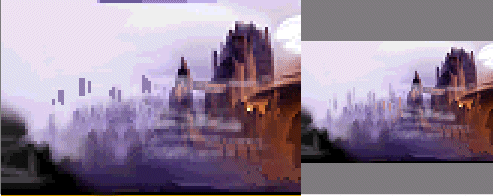
* Tip: Here's how you quickly apply any size image to the side of a truck.
Make sure you have your texture open, and increase the colors to 16
Mil. Now select the area of the image you want applied to the truck.
For all my normal selecting, I use the Rectangle type. Once you have
it selected, click Edit/Copy. Now select the area of your truck that you want the image to fit in.
This might be the area near the door, a hood, a tailgate, or a bedcover.
Now just click Edit/Paste/Paste into selection. Your image will be sized
down to fit! Now before moving on, click Image/Sharpen/Sharpen or Sharpen
More and your image will regain much of the detail that was lost during
the resizing. It won't regain all of it of course but it will appear much more crisp
than before. Try it !
|
|
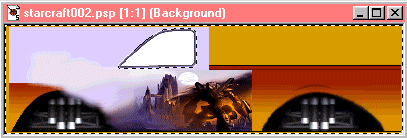
Step 2. Select boundaries if necessary. As you can see - there is
more space on this image than necessary and I need to make sure I can find
the edges of this thing when I go to copy/paste them back to the original
textures. For right now, I just want to keep the window placement so I
blocked that off. The wheel wells could also be blocked off but since I
will be using Toxin's body with the wheel wells cut out, it won't matter
if I cross over. Later I show how in one quick step and you can have those
wheel wells back in no time!
|

|
|
* Tip: I find it easiest to select the area I DON'T want to work on, and then use Selections/Invert. Try it!
|
|
Step 3. Decide what color you want the cab, hood, and front to be,
unless you plan on trying something tricky. Aligning the hood is easy when
it's a solid color but try wrapping a strip of color from the side up to
the hood area and you may run into frustration. Same goes with the front,
corners, back of the cab. The effort is rarely worth the frustration so
keep it simple; Make sure these areas are the same color! As soon as you
have an idea what color you want - start smearing the colors from the edge
of your image to the rest of the body.
I started with the Retouch Tool/Push, and used mild settings.
This allows for you to drag the primary colors out onto the rest of
the truck to create the base-paint.
|

|
|
Image: You can see I selected the front end right up to the edge of the textures.
|
|
Step 4. There's a nice quicky job for the front and now lets stick
some base-paint onto the back. I selected the truck areas more closely
now so I won't have have to do any edge work after I'm finished.
|

|
|
Notice in this image, I selected the window with the Freehand Selection Tool,
then used the Selection Tool to get the outside edges. After this, I then
invert the selection so I will only be able to paint on the truck body,
not the outside, or on the window. Again, this image is BEFORE I inverted
the selection!
|
|
Step 5. I started this out with the Airbrush Tool for no other reason
but to try it and see if I like this or the Retouch/Push function. After
careful consideration, I'll go with the Push. When I started painting this
with the Airbrush Tool, I was affraid it would give me trouble but I kept
at it even though I wasn't pleased with how it was turning out. What do
you say when it starts to go wrong? "Hell - keep going - we'll make something
else out of it!"
|


|
|
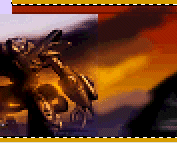
Above Image: After a LOT of using the Retouch/Soften and Retouch/Push, I blended
the colors together, but there seems to be something missing...
|
|
Step 6. How cute! I made a wee little castle in the back! The detail
was very sketchy but I had planned to use Retouch/Darken RGB so the sky
would fade to dark. It turned out a little better than I expected which
upset me that I had to darken it :oP Oh well.. copy/paste, copy/paste...
lets make it a little bit bigger!
|

|
|
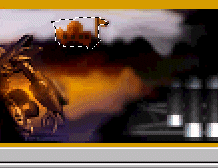
Step 7. Now I do some finishing touches in the sky. It's not the
best but it's somewhat acceptable. Notice while doing the touch-ups, I
have selected the work area again to be sure to preserve those outer edges.
After finishing up the rear touchups, I select the area of the cab
and complete the basepaint for the top.
|

|
|
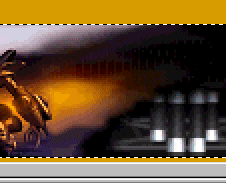
Review: Now take a look back at an earlier step to see what the front end detail
looked like. I was not satisfied with the blur so I added detail to this as well.
|

|
|
Step 8. Taking a clip from an older image, I pasted it a few times
to get a guide for my next work. I started with the misty cloud look, and
after fiddling with it, I really got into the flow of things. I added some
lines to start off the tops of the buildings, and then used the good ol'
Retouch/Push, I blended the high spots downward, and incredibly - I restored
the appearance of buildings, and then carried the image downward to the
wheelwell.
|

|
|
This part turned out exactly as planned, but the rear had no
plan so I just did what I could for it. Luckily enough, it won't matter
because there will be text applied to that area anyways ;o)
|
|
Step 9. Here's the part where you stick a wheel well back in place.
Use the Magic Wand and set the tolerance to about 10-20. Now proceed as
I did:
|
-
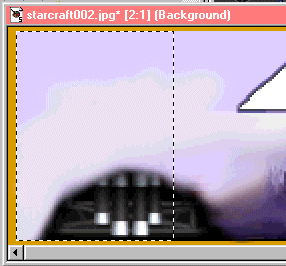
image 1: I click the black part of both wheel wells. If you did
not over-shoot by much while painting, you can simply copy/paste the black
area to the new textures.
|

|
-
image 2: Use the Freehand Selection Tool, and hold SHIFT and start
gathering up the rest of the wheelwell area. Now you have the whole thing
so u can copy/paste two perfect wheelweels! If you have excess junk sellected,
just hold CONTROL and you can unsellect it!
|

|
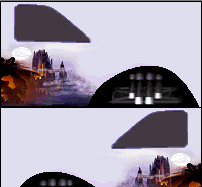
- Image 3. This is the before image where I have painted over the lines.
|

|
- Image 4: I have pasted the wheelwells on!
|

|
| Ta-da! |
|
Step 10. Now lets take the sides, and copy/paste them back to the
original textures. Make sure when you do this, that you increase the colors
of the texture images to 16 million colors. For my windows, I used the
Eyedropper Tool to select a decent shade of dark grey and used the Fill
Tool to fill in the window color. After that, just use the Line Tool to
color all the pixels that did not get colored.
|

|
|
Step 11. Now lets get down to some intense imaging tricks. I have
a nice faded front end already and would be a shame to let that go to waste.
So before I decide to paint it a solid color, I want to see how this would
look in a matching color. First, I hold SHIFT and select all the areas
I need a color switch on. You can see on the left side image, I have selected
the bumper, the headlight area, and the grill area.
|
Step 12. Now hold the CONTROL key and start unsellecting the areas
we don't want the colors changed in. On the right side, you can see I unsellected
the KC lights and text on the bumper area. Then I switched to the Freehand
Selection Tool, and while holding CONTROL, I unselected the headlight glass
and the grill. (Later, I'll show you how we HEAT the grill for a Bar-B-Q... j/k tee
hee :)
|

|
|
Step 13. 'Copy' and 'Paste as New Image'. Now use Colors/Adjust/
'Hue/Saturation/Lightness' and vary the hue control until you get something
matching the color of your truck. For mine, I had to lower the Saturation
level to get a very 'bland' shade of purple. If you find any other sections
of your truck, these settings will remain intact so you will get the same
color adjustments! Now just copy this image and paste it to your truck
texture.
|

|
|
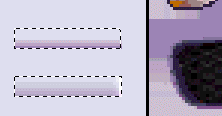
* Tip: Take note of the areas where the textures line up, particularly
the front end. My purple faded front end came to an abrubt edge where it
connected to the bright color of the hood. So what I do is fade the darker
purple towards a lighter shade! To do this, I took the purple color
from the top of the front and draw a line horizontally. Then I take a lighter
color and draw a line just on top of it, Take one more lighter shade, and
draw a third line. Now select the area, with 3 or 4 pixels extra on top.
Now use Image/Blur More a couple times, and you will get yourself a quick
dark to light purple fade. Now you can select this, and use the 'Paste
into Selection' trick I mentioned before. Just select the area above the
light or grill (mine was only 3 pixels high!) and paste your fade into
the selection. Try it!
|

|
|
Well that's about the size of it ! The rest is the same old Line
Tool touch-ups I hope you all have been using in your paint efforts. Copy/Paste
text, logos, etc and slap this baby together to see how she looks! I hope
this tutorial has been a help to you and I look forward to seeinig some
very nice trucks done in this style in the future. I think they look nicer
than anything else out there. I just love the airbrushed image look ! Hope
you all do to! - Alpine
|

|
Note: I tell everyone to work using .GIF images. When reducing
colors, use 'Nearest Color Matching'. If you save as .GIF and a dialogue
asks if you want to reduce colors, refuse. It's best to be safe and reduce
colors manually to make sure it uses the correct setting and not 'Error
Difusion Dithering' which could really screw up a paintjob! The reason
for working in .GIF format all the time is because with so many clips layed
out in PSP, chances are you'll close one on accident and you WON'T want
to bother loading a palette file to re-open it. Later, when ALL your copy/pasting/retouch
work is done, you can save it as .GIF and THEN save it again as .RAW. Trust
me when I say - you save lots of time and loads of stress by knowing you
don't need a palette file for anything. You DON'T actually... only Binedit
and MTM2 need them. So why bother with them now? Just wait til you wanna
check your work in Binedit, and THEN make the palette files. Until then,
keep everything in .GIF! Laterz !!
|
|
