|
| ||||||||||||||
|
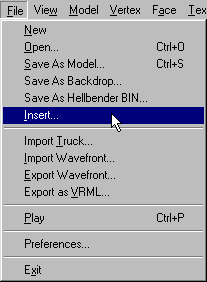
(Insert) The insert feature of BinEdit is a huge time saver and adds incredible flexibility to model making. It allows you to build your model in parts that can later be merged into the whole finished thing, it allows you to add parts to already existing models, and it allows you to duplicate parts of your model with ease and precision. Let's continue with our zep house example. Recall, we just translated the model forward 1000 editor units. Now, from the menu goto Files>Insert
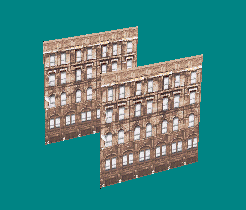
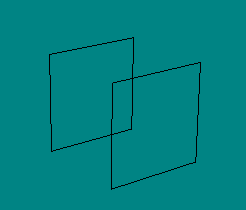
A standard windows box will appear. Browse to the model you want to insert. For our example we will use the same one we've been working on. That is, we will re-insert the model into itself again. Like this.
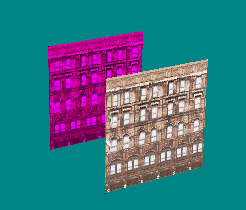
That's it. You have just inserted one model into another. In this case, it was the same one into itself, but the principle is the same for anything you might try. For example, you could add a roll bar to a truck, or I have seen where somebody inserted two mtm2 grandstands side by side so as to be able to artificially exceed the 541 model limit in the game. Anything at all. Save your model and continue with your work. Addendum. So, you ask, why would anyone want to insert two of the same basic model? The answer is easier than you imagine. Notice that our model is now three-dimensional. It has width and height as before, and in addition, it has depth. And, we did not have to define verticies or calculate their points. This may not seem like a big deal nor does it appear practical, but follow along as we turn this bit of simpleness into something worthwhile. Use the space bar to highlight the back face.
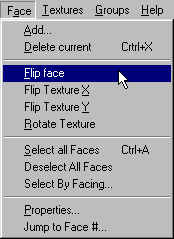
From the menu, select Face>Flip face.
The face will seem to disappear. It has not, but it is no longer visible. Recall, that is because it's pointing away from us now.
Switch to wireframe mode for a better view.
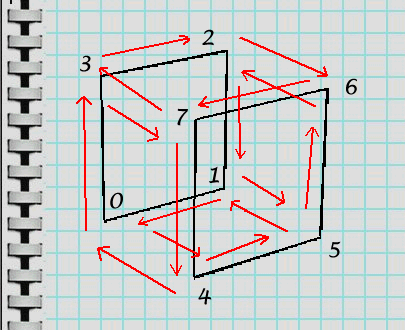
Use the tab key to cycle through the verticies. Notice there are eight now; not just four. From this information, we can determine easily where we can add more faces. For example:
On the menu, goto Face>Add Use the diagram to enter the vertex points for each face. For example:
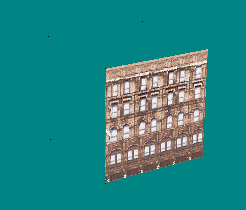
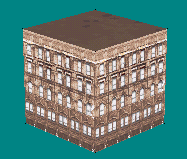
Goto Textured view, and we can see the zep house is almost complete:
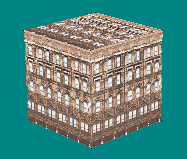
Create a texture or map the face to a small part of the existing texture for the roof and bottom of the model. Like this:
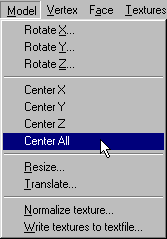
Not quite done. Remember that models work best if they are centered properly, but when we translated 1000 units we did not account for centering. So, rather than translate the whole model back half way, take the short cut. Goto Model>Center All:
Save your work. You have just created an easy 3D building. |