|
| ||||
|
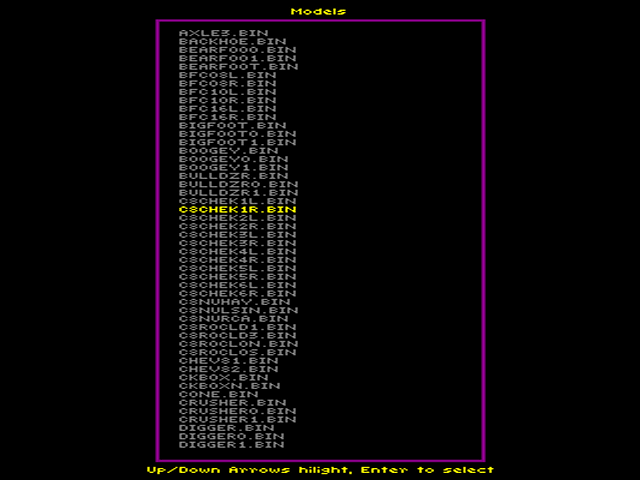
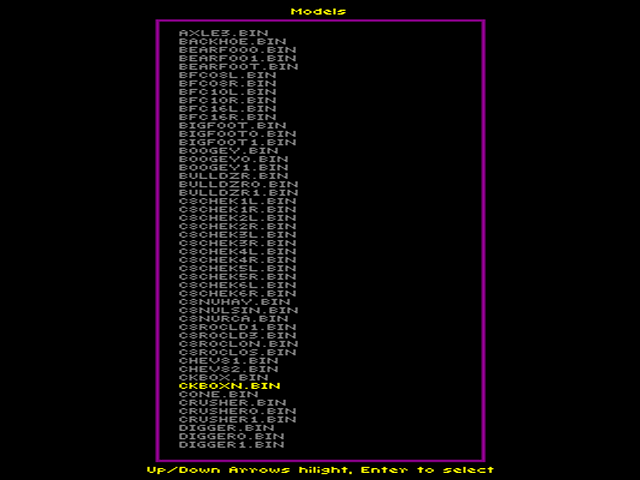
(Model/Box Editor) Checkpoints are just special models (which are called boxes in the editor). To work with models we need the Model Editor. First we need toget rid of the crazy 98 models. From the track editor menu, select "I. Move/Edit/Delete Boxes" by pressing the I key. You may also use the arrow keys to highlight "I. Move/Edit/Delete Boxes" and press enter.  You will see the crazy 98 models. Press X to delete the first model. Press it again to delete the next. Continue this way until there are no models left. When done, you should be taken back to the track editor menu. We're now ready to add our own models/checkpoints. From the track editor menu, select "H. Place Boxes" by pressing the H key. You may also use the arrow keys to highlight "H. Place Boxes" and press enter. 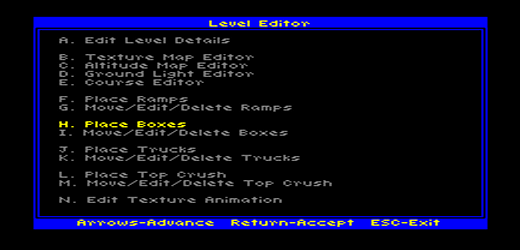 You will see your track in the editor window. You should be at the (XP,ZP) location of (0,0) and you should see a little green square at the cursor. Press J for jump, type 128,128 for your track, and press enter to get there. 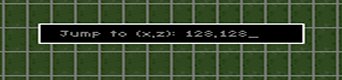 The little box will move with you. Place it just in front of the line of trucks. 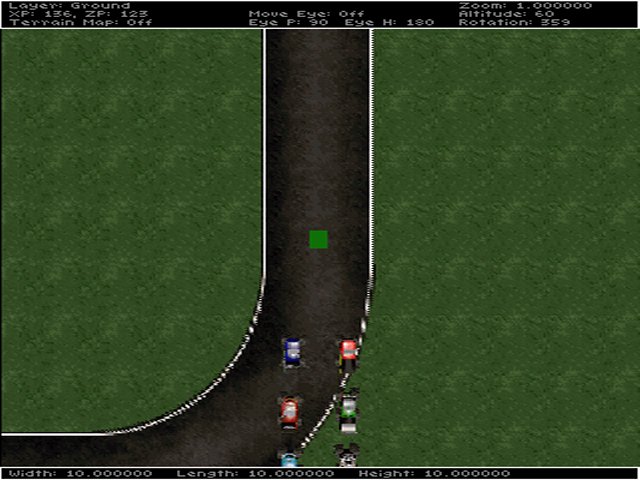 Press the F key to open the Model File List Selector. 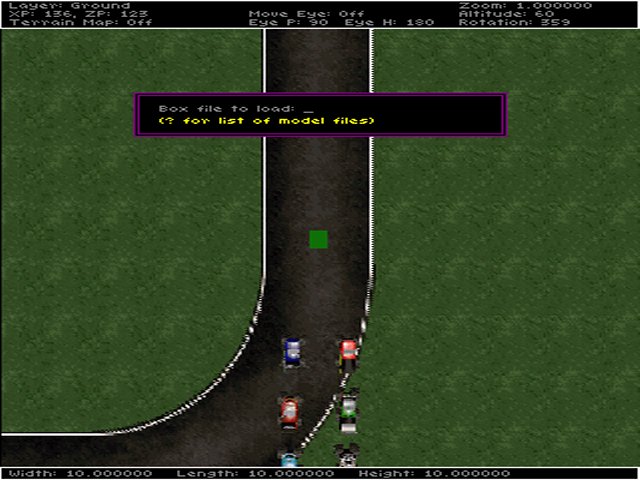 Press the ? (question mark) key and press enter. A complete list of models will appear. Scroll down until you come to STLITE.BIN. Highlight it and press enter. 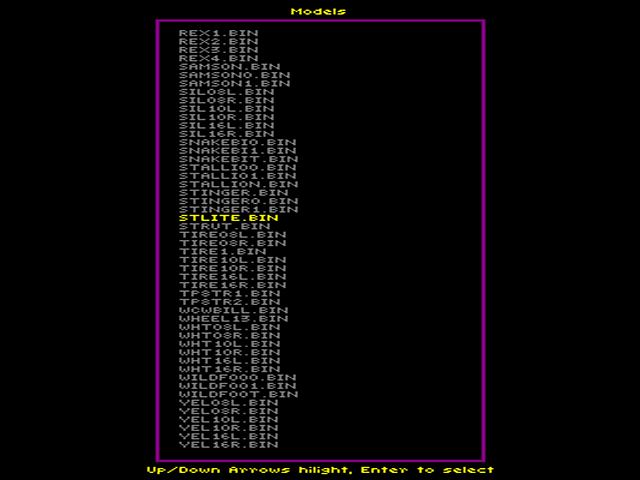 The little green box we saw before will now change to the start light model. You can move it around using the arrow keys to place it exactly where you want it. Press the Space bar to anchor it to the ground. 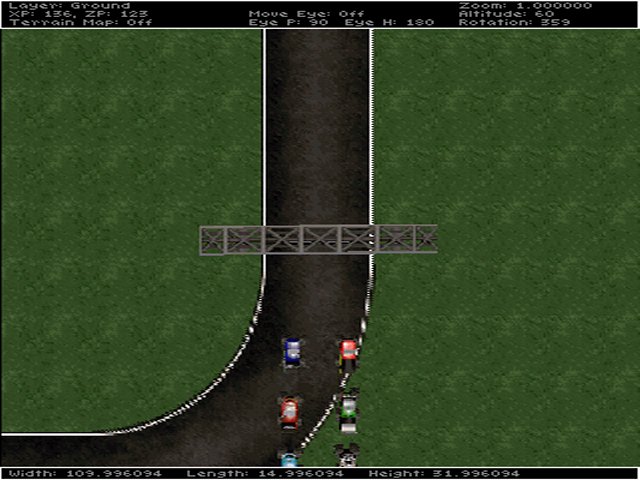 When you place models in a track, the game prevents you from driving through them. This is a good thing for grand stands and road barricades, but a bad thing when you want to drive through the start gate. To solve this problem, the model needs to be made non-collideable. To do this, press Esc and re-enter "I. Move/Edit/Delete Boxes" The start light is the only model so far, so it will be highlighted. Press the B key to set it's properties. Choose Type from the menu and press enter. 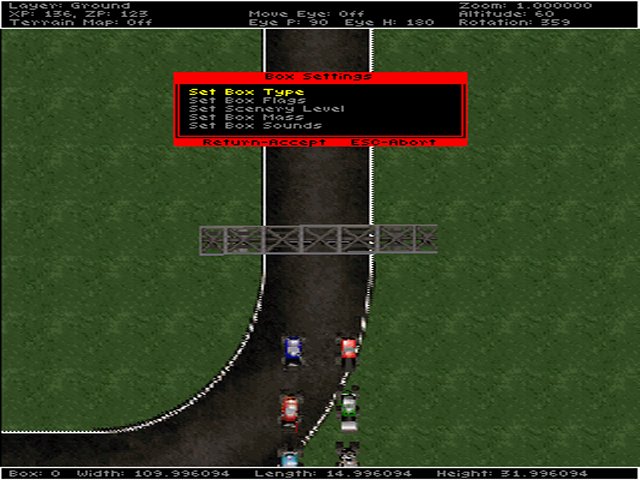 Now choose non collide and press enter. 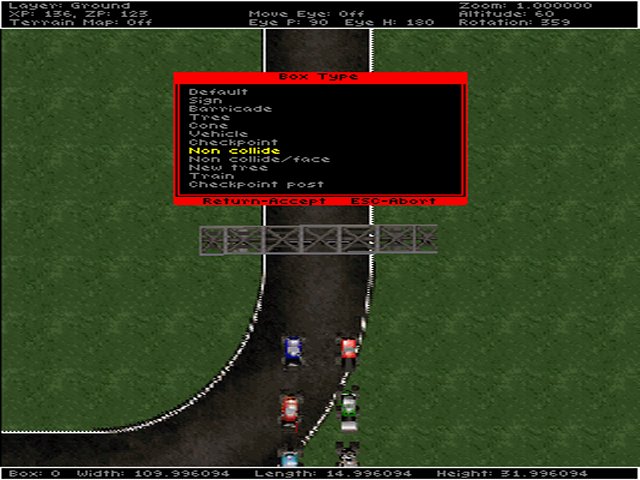 Now we can add checkpoint flags. Press Esc and select "H. Place Boxes" from the menu. Notice, you're at (0,0) again. Press the J key to get the jump box, type 128,128 for your track, and press enter to get there. Press the F key for the Model File List Selector, press the ? key for the full list and select C8CHEK1L.BIN. Use the arrow keys to place it near the beginning of the straight road across from the start light. Press the space bar to anchor it to the ground. Press Esc and then "I. Move/Edit/Delete Boxes" to set it to non collide (B, type, non-collide). Repeat for C8CHEK1R.BIN but place it across the road from the first flag. 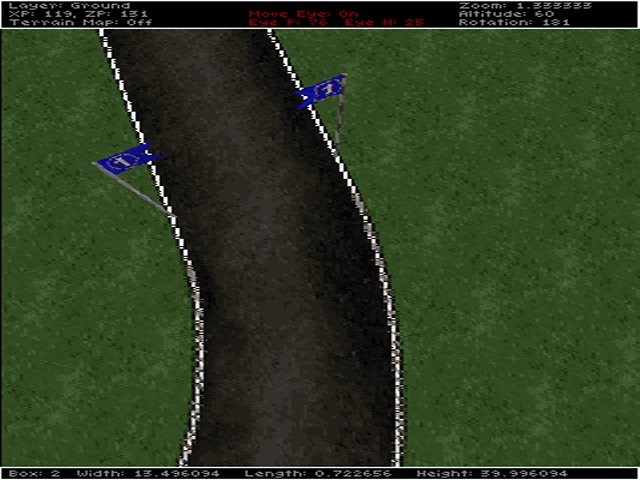 In order to prevent driving through the flag poles and the bases of the start-line object, some additional objects must now be added. Enter "H. Place Boxes" mode and move up to your track. Move the box near one of the checkpoint flag poles. But this time we wont apply an object to it (these boxes with no model are invisible in the game, but cannot be driven through). Change the "Size" values to 2 x 2 x 38. Use the number 2 key to make it thinner, the number 4 key to make it narrower, and the number 5 key to make it taller. Move the object so that is in the same location as one of the checkpoint flag poles. Press the space bar to anchor it to the ground. 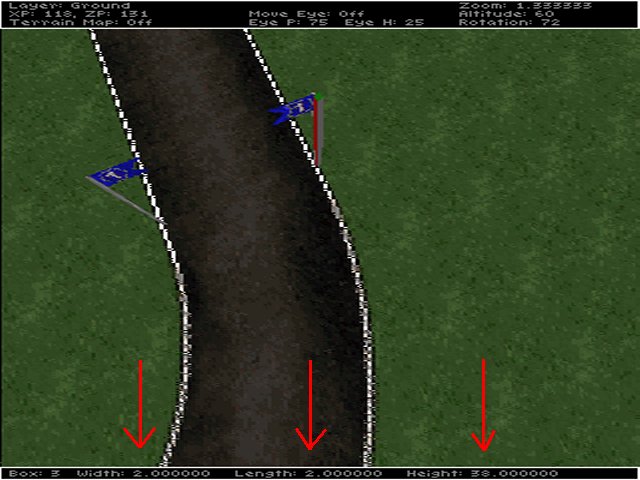 Now a truck will be able to pass under the flag part but not through the pole. Tip. To see what you're doing better, press the E key to adjust the 'camera' view. When you're done, press E again to move the model. Note. If you don't place it perfect the first time, enter "I. Move/Edit/Delete Boxes" mode to make more adjustments. Repeat for the other flag pole. Repeat two more times for the bases of the start-line object, but this time setting the size to 16 x 16 x 20. A good way to check you have the boxes centered properly is to look at the objects from several different views. Checkpoint behavior. So far, we have only made the appearance of checkpoints - additional objects need to be added to make them function correctly in the game. Enter "H. Place Boxes" mode to add a new box. Move up to your track and from the Model File List Selector, pick CKBOXN.BIN (not "Ckbox.bin"). Place the ckeckbox model just in front of the the checkpoint flags. Note. This is important. Checkpoints must start at checkpoint 1 and be placed in proper order. The last one you put in should be the finish line. You always lay down the checkpoints in order from 1 to XX and you place the starting light last. This one is always your last checkpoint when you are racing. Make sure the arrows are pointing in the right direction and make sure the front edge of the object is lined-up to be just in front of the flags. Press space to anchor it. 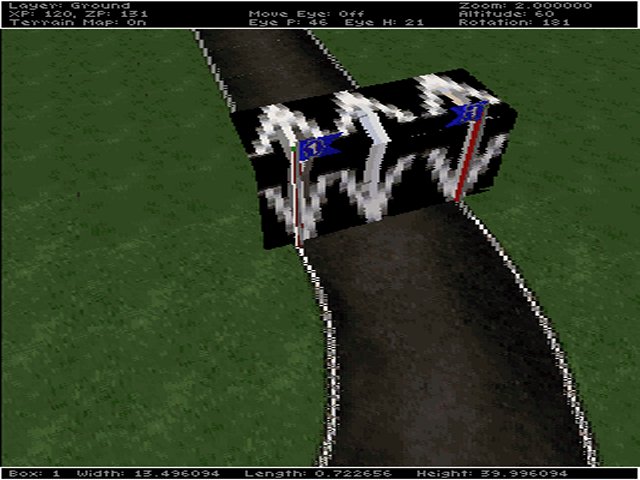 Do not exit Place Model mode. Just move the arrow keys and you will see two models. The one you just anchored for the checkpoint, and another at the cursor. Move this new one to the start/finish line. Press the space bar to anchor it.  Now you can enter "I. Move/Edit/Delete Boxes" mode and set the property type. Begin with the checkpoint at the flags. Press B for properties, choose type, and select checkpoint. Use the bracket [,] keys to move to the one by the finish line. Set it's properties to checkpoint also. Save your work. Now we can test drive your track. Press Esc to return to the main menu. Save your track if you're prompted to do so. Highlight "Test Drive" and press enter. You will be prompted for your track name. Type "mytrack" and press enter again.  The checkpoints should register correctly. If not, go back and tweak them until they do. Because we didnt set a backdrop yet, the horizon may look funny - dont worry about that.
|